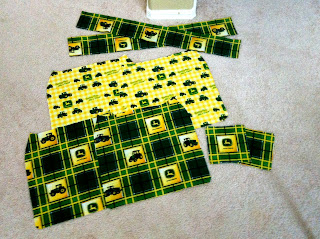
My son has a small obsession with tractors. I blame it on spending the summer in the midwest (and the fact that my dad works for John Deere). Anyway, I mentioned a few posts ago that I've been wanting to make a small bag for Matty to take with him to church daycare during my MOPS meetings. Nothing too fancy; just a bag to hold some diapers, a sippy cup, and "bway bway" (his blankie). I have a TON of leftover John Deere fabric from his birthday party, and this was yet another project I could do to try and use some of it up!
So here we go. I free-handed the pattern for this bag because I had made something like it before, and I knew roughly the dimensions I wanted it to be. So I cut 2 pieces out of my liner fabric and 2 pieces out of my outer fabric, both approximately 15 cm by 19 cm. I then cut out two squares (about 6 in X 6 in) for an inner pocket, and two pieces ( 4 in X 29 in) for straps. I also cut out two pieces of batting the same size as my bag and one piece as long as my strap, but it isn't pictured.
I started with the pocket, only because I wanted one. This step is completely optional. Take your two squares, put them right sides together, and then sew around all 4 sides, leaving a small opening in order to pull it right side out.
Pull ride side out and press flat, tucking in the edges of your opening. I top-stitched across the top of the pocket, purely because I liked how it looked. It's not necessary to do so.
I pinned the pocket to the right side of one of my pieces of liner fabric.
I then top-stitched around the three sides of the pocket, obviously leaving the top side open. I actually did a double stitch around it, not only because it looks nice, but also because it gives your pocket a little bit more strength.
I then took my two pieces of liner fabric and pinned them right sides together. I stitched around the two sides, leaving the top open and also a small opening at the bottom in order to turn right side out.
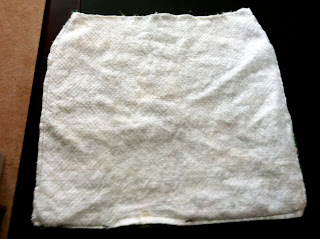
I then took my batting pieces and put them against the wrong sides of my outer fabric, placing the two outer fabric pieces right side together. (See picture below if this doesn't make sense).
I did the same thing to these pieces of fabric, sewing along the sides but leaving the top open, as well as a small hole at the bottom for flipping. Afterwards, I turned it right-side out, and pressed flat.
I then slid my outer fabric into my liner fabric, so that all right sides were facing each other (see picture if this is unclear).
I stitched around the top, binding all layers of the fabric together.
I turned the whole thing right-side out but, before stuffing my lining into the bag, I hand-stitched the opening in the bottom closed. Some might say this isn't necessary since no one will really be looking at the lining anyway, but once you lose something through that tiny little hole just once, you'll realize it IS necessary to sew it up. So save yourself a headache, take 10 minutes, and stitch up the opening! Then push the lining into the bag and press. Top stitch around the top of the bag and hand-stitch closed the opening in the bottom of the bag.
Take your two pieces of strap fabric and put them right side together, also pinning the piece of batting to one side. If you're going to use this to carry books or other heavy items, you might consider using two pieces of batting for the strap. But, for carrying diapers and the like, I thought one piece was enough.
Stitch around the long sides, turn right-side out, press, and top stitch all around, turning in open edges.
You can attach the straps to the bag however you'd like. I chose to fold my at an angle and attach that way. Mainly because I was planning on decorating the ends with a button and didn't want the strap to be poking out from behind the button.
Hard to see in this picture, but I hand-stitched two buttons to either side of the bag right below the strap. You don't have to do this step, but I think it does add a nice touch to the finished bag.
Happy sewing!


No comments:
Post a Comment