This week's challenge is a bit broad and vague, like the one we had a few weeks back that encouraged us to "have healthy relationships." Umm. . . okay. So, I'll try to explain to the best of my ability what I think the author really means by this week's change, entitled "Be a Great Communicator."
Effective communication is necessary in every single relationship you ever participate in. Period. Being able to clearly and calmly express your feelings and thoughts while allowing others to do the same enables you to bridge gaps and gives you the power to deal with people from all different backgrounds and perspectives. So this week, the challenge is to practice effective communication in all your daily interactions.
Easier said than done, but here a few tips to get you started:
1. Practice Active Listening. If you do nothing else this week, practice this skill. Actively listening does more to make other feel important and respected than anything else you can do. It also makes YOUR communication more effective if you know what the other person is thinking, feeling, and saying. So what is active listening? FOCUS on what the other person is saying instead of planning what you are going to say next. Don't interrupt. Pay attention to body language, which can often say more than words ever can. Ask questions. It's cliche', but so true: "listening" is so much more than "hearing."
2. Keep Attitudes in Check. This goes for both talking AND listening. Belittling and criticizing does nothing to improve relationships and only serves to prove your importance over the other person's. In addition, sighing, eye-rolling, and "fake listening" are barriers to real, honest, communication.
3. Be Clear, Be Brief. People who drone on and on about a particular topic (and especially themselves) often lose their audience and send a message that he or she is more important than the other person. Make an effort to be clear and concise, ensuring you give the other person equal opportunity to share his or her opinions and thoughts.
Again, this week's challenge is a bit broad and vague, but try to at least take these few steps as a starting to point to improve your daily communication. Good luck!
30 September 2012
23 September 2012
52-Week Challenge: Week Thirty-Nine
Ohhh, I love this week's challenge. I seriously think I would be highly successful in a career as a professional organizer. I LOVE to de-clutter and organize. It's almost an obsession. So, if you don't want to do this week's challenge, call me. I'd love to do it for you. :)
This week's challenge is to de-clutter, simplify, and organize your home. *Yay!*
I will be the first to admit that, like most people, over time, I seem to accumulate a lot of stuff --natch-- junk. Some stuff I just don't use anymore, some stuff is out-dated, some stuff is broken, and some stuff I don't know why I bought in the first place. However, unlike most people, I do not have a problem getting rid of it. I religiously go through my clothes at the end of each season and, if I haven't worn it that year, it gets donated. I periodically (i.e. once every few months) go through other things in the house as well. If it's broken, it gets thrown in the trash. If it's outdated or simply un-used, it gets donated. If I just don't need it anymore, it usually gets passed on to a friend. I love the feeling of de-junking my house.
BUT--I know a lot of people that are like my husband. When confronted with making the decision to keep or not to keep, it always seems easier to just keep it. An old Playstation (2, mind you, not even 3), a de-humidifier (we live in the desert), or--most recently--a broken coffee maker; it doesn't matter what it is, he seems physically unable to part with it. It almost makes me claustrophobic and, without a doubt, causes me stress.
Perhaps that's why I'm so excited about this week's challenge. I have excuse to get rid of that stuff.
Basically, the things in your home can be boiled down to three categories: 1) things you need, 2) things you like, and 3) clutter. Focus this week on getting rid of things in that third group. Here's a gameplan for doing this:
1. Obviously, you should keep anything of value. Really sit down and try to determine is something has functional value (makes life easier and is necessary for everyday living), historical value (has an attachment to your personal or family history), personal value (something important to you for your own VALID reasons), or aesthetic value (creates beauty or is aesthetically pleasing). If an item doesn't provide any of these four values, toss it or give it away.
2. Create a plan. Maybe your entire house is cluttered. Maybe it's only one area. Whatever the case, figure out an area to focus on, and get started. In line with this is FINISH WHAT YOU START. Don't half-ass de-clutter. It will only make your house more un-organized.
3. Get the big things out of the way first. Furniture, appliances, electronics--many of these things can be sold or donated. Get rid of them first, and then you'll have more room to work.
4. Sort. I find it's easiest to sort things into piles: keep, toss, donate. This allows you to cut through all the clutter quickly and then focus on organizing the things you're keeping, throwing away the stuff you're not, and finding homes for the things you're giving away.
Best of luck!
22 September 2012
Matty's MOPS Bag
My son has a small obsession with tractors. I blame it on spending the summer in the midwest (and the fact that my dad works for John Deere). Anyway, I mentioned a few posts ago that I've been wanting to make a small bag for Matty to take with him to church daycare during my MOPS meetings. Nothing too fancy; just a bag to hold some diapers, a sippy cup, and "bway bway" (his blankie). I have a TON of leftover John Deere fabric from his birthday party, and this was yet another project I could do to try and use some of it up!
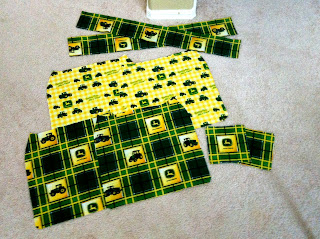
So here we go. I free-handed the pattern for this bag because I had made something like it before, and I knew roughly the dimensions I wanted it to be. So I cut 2 pieces out of my liner fabric and 2 pieces out of my outer fabric, both approximately 15 cm by 19 cm. I then cut out two squares (about 6 in X 6 in) for an inner pocket, and two pieces ( 4 in X 29 in) for straps. I also cut out two pieces of batting the same size as my bag and one piece as long as my strap, but it isn't pictured.
I started with the pocket, only because I wanted one. This step is completely optional. Take your two squares, put them right sides together, and then sew around all 4 sides, leaving a small opening in order to pull it right side out.
Pull ride side out and press flat, tucking in the edges of your opening. I top-stitched across the top of the pocket, purely because I liked how it looked. It's not necessary to do so.
I pinned the pocket to the right side of one of my pieces of liner fabric.
I then top-stitched around the three sides of the pocket, obviously leaving the top side open. I actually did a double stitch around it, not only because it looks nice, but also because it gives your pocket a little bit more strength.
I then took my two pieces of liner fabric and pinned them right sides together. I stitched around the two sides, leaving the top open and also a small opening at the bottom in order to turn right side out.
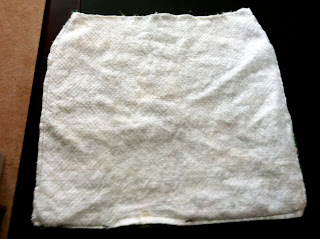
I then took my batting pieces and put them against the wrong sides of my outer fabric, placing the two outer fabric pieces right side together. (See picture below if this doesn't make sense).
I did the same thing to these pieces of fabric, sewing along the sides but leaving the top open, as well as a small hole at the bottom for flipping. Afterwards, I turned it right-side out, and pressed flat.
I then slid my outer fabric into my liner fabric, so that all right sides were facing each other (see picture if this is unclear).
I stitched around the top, binding all layers of the fabric together.
I turned the whole thing right-side out but, before stuffing my lining into the bag, I hand-stitched the opening in the bottom closed. Some might say this isn't necessary since no one will really be looking at the lining anyway, but once you lose something through that tiny little hole just once, you'll realize it IS necessary to sew it up. So save yourself a headache, take 10 minutes, and stitch up the opening! Then push the lining into the bag and press. Top stitch around the top of the bag and hand-stitch closed the opening in the bottom of the bag.
Take your two pieces of strap fabric and put them right side together, also pinning the piece of batting to one side. If you're going to use this to carry books or other heavy items, you might consider using two pieces of batting for the strap. But, for carrying diapers and the like, I thought one piece was enough.
Stitch around the long sides, turn right-side out, press, and top stitch all around, turning in open edges.
You can attach the straps to the bag however you'd like. I chose to fold my at an angle and attach that way. Mainly because I was planning on decorating the ends with a button and didn't want the strap to be poking out from behind the button.
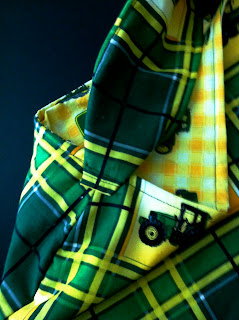
Hard to see in this picture, but I hand-stitched two buttons to either side of the bag right below the strap. You don't have to do this step, but I think it does add a nice touch to the finished bag.
Happy sewing!
17 September 2012
A Sunday Night Allergy Attack Project
We are fighting a serious case of the crud in my house this weekend. Well, MJ is fighting a case of the crud. Mine seems to be more allergy-related. Whatever the case, it's been a "staying in your pjs-hair pulled back-no contacts-drugged up on Benadryl" kind of weekend. And, as some of you may know, it doesn't take much for me to get cabin fever. Only two days of being stuck at home, and I was going a little stir crazy. That meant it was time to pull out the sewing machine.
MJ and I started MOPS this year, and I wanted to make him a little bag that I could drop off with him at childcare for diapers, clothes, etc. A full-up diaper bag just seemed too much for the task. AND I had some super cute John Deere fabric left over from his birthday extravaganza that I needed to use up. However, the more I looked at this fabric, the girly-er I found it. It's supposed to be "bandana" type material, but the little swirls and flowers just made it look too feminine for a boy's bag. So I decided to use it in my first attempt at a hobo bag instead, which I'd always wanted to try. Sorry, MJ. Your bag will have to wait a few more days. :)
Anyways, I started out with about two yards of fabric and, from it, I cut out two squares, each 27" X 27", as well as 4 strips of 3" X 10" and one 4" X 10" strip.
From there, I put large squares RIGHT SIDES together. I pinned them, leaving a 4" gap in the center of one side.
Sew around the squares, using a 1/2" seam allowance, leaving the 4" gap open. Turn the squares right side out and press flat, folding in the opening about a half inch.
Next take your 4" X 10" strip and fold it in half, making it a 4" X 5" square. Sew all around, leaving an opening to turn it right side out.
Flip it right side out, press it, and top stitch all the way around. Top stitching is not my greatest strength but hey--practice makes perfect, right?
Place your now-finished 4" X 5" strip about 1" into the gap in your large squares. Pin it in place, then top stitch around the entire thing.
Next, take the opposite three sides (the ones without the strip coming out of it) and sew a 2" pleat in the center of each. This was my first time attempting pleats, but it really wasn't that hard. You simply fold and sew. The picture isn't very good. Google it if you need more specific instructions. :)
Next, take your 3" X 10" strips and fold them in half length-wise. Sew, leaving one end open to turn it right side out. Press, and top stitch. Honestly, this is what took me the longest out of the entire project. I hate turning skinny pieces of fabric inside out. UGH. My advice is to have a chopstick handy.
Finally, take your handles and pull one corner through about 3". Fold the corner down and tie tightly with one of your strips. Do this to all four corners.
And there you go. A hobo bag. Pretty easy.
Happy sewing!
16 September 2012
52-Week Challenge: Week Thirty-Eight
"We are living in a world today where lemonade is made from
artificial flavors and furniture polish is made from real lemons."
--Alfred E. Newman
This week's challenge is to avoid eating foods that contain additives. Additives are fillers, preservatives, and other ingredients that you really don't want in your body. These are man-made chemicals that have been linked to cancer, heart disease, lung and kidney disease, and other health issues. Here are a few tips to help you this week.
1. Focus on fresh, whole foods. As much as possible, try to eat foods that are food in nature. If it's grown in the soil, grown in a tree, or comes directly from animals, fish, or fowl without any processing, then it's pretty much safe to eat.
2. Know your additives. It's unrealistic to think that you'll NEVER eat packaged foods. Therefore, it's important to know which additives are the worst and, therefore, are the ones to avoid at all costs. The book contains a really good chart outlining these additives, what they are found in, and why they are bad for you. I'll just highlight a few here:
*Artificial colors; found in baked goods, beverages, candy, cheese and are suspected of being carcinogens
*Artificial flavors; found in most processed foods and is linked to asthma, eczema, and other disorders
*MSG; found in candy, beverages, frozen food, and lunch meat and can can depression, eye damage, headaches, and nausea
3. Use three quick tests. When in doubt, use these three quick tests to decide if a product should be avoided:
a. If the list of ingredients on a package is long (more than five ingredients), there are probably chemicals additives in the food and it should be avoided.
b. If you find certain ingredients difficult to pronounce, there's a good chance the product should be avoided.
c. If the product contains ingredients your grandmother has never heard of, avoid it.
15 September 2012
Doomsday Preppers and a Dinosaur Park (or 'Happy Anniversary!')
Jonathan and I recently celebrated our five year wedding anniversary. Of course, he had to work on our actual anniversary, so we had to wait until Thursday to get a much-needed night out to celebrate. And how did we celebrate, you may ask? By taking a trip to the Clark County Shooting Range and blowing off some steam (literally). It was like a date night for 'Doomsday Preppers.' But, actually, it was a lot of fun.
Yes, I look cool shooting the AR-15, but I wasn't so hot at actually hitting the target. The pistol, on the other hand, was another story. I was quite proud of myself. Talk about a momma bear. Now I'm a momma bear with a GUN.
After shooting, we went over to Aliante Station, a "locals" casino for some dinner and a bit of gambling. The best part, however, was climbing to the roof of the parking garage at sunset for some pretty spectacular views of the city and surrounding mountains.
I doubt 'Doomsday Preppers' would take the time to enjoy a sunset. So, okay, the romance isn't COMPLETELY dead in our relationship. ;) After that, we ventured out to a nearby park, Aliante Nature Discovery Park, to walk around the lake. Vegas is still scorching hot during the day, but it's quite pleasant after the sun goes down, and we really enjoyed taking a walk and watching the wildlife . . .
. . . so much, in fact, that we decided to take MJ there the next day, along with some crackers to feed the ducks and turtles. He was a little unsure, especially after we threw some crumbs at his feet, and he was swarmed by pigeons!
Clinging to Mommy's leg as the ducks got closer, begging for food.
Gaining confidence, and playing with the geese poop. Fantastic.
After we'd run out of crackers, we headed over to the dinosaur part of the park.
Digging for "dinosaur" bones with Daddy . . . but really just getting sand in his shoes.
Petting the dino.
"Hey--that's MY hat!"
Brave boy walking through the triceratop's mouth with Daddy . . .
Best part? Splash pads!
Getting splashed by big kids!
"Mom . . . I'm all wet!"
Love the excited shrieks!
Learning about dinosaurs (and drying off before getting back in the car!)
Bye-bye, duckies! See you next time!
09 September 2012
52-Week Challenge: Week Thirty-Seven
Last week, while discussing things to do during my husband's three days off, all I could add to the conversation was "I need to get out of the city." Maybe it's just me, but there are times when I just feel so claustrophobic living in a big city. To be constantly surrounded by buildings and other people . . . it's just so suffocating. Does anyone else feel this way?
Anyway, so I can understand completely this week's challenge, which is entitled "Get Back to Nature." Spend more time outdoors and in nature and less time plugged into technology.
Little did I know, but there are actually studies that have proven that spending time in nature is good for you. Researchers have found that being in nature promotes feelings of connectedness, purpose, and belonging to something greater than oneself. It also promotes a positive attitude, mindfulness, and creativity, as well as increased focus and attention, and heightened sensory awareness.
This is not only true of adults but also children. Nature stimulates children's imaginations and creativity and can enhance cognitive flexibility, problem-solving ability, and self-discipline. Research also found that children exposed to green spaces, even in cities, demonstrate improved ability to pay attention, become less impulsive, and are more patient.
I make it a point for my son to play outdoors for at least a little bit of time every day. This means that I myself have to be outside as well, since he's too young to be outside unsupervised. Make it a point this week to do the same with your children. Take a walk, visit a park, start a garden--anything to get yourself and your family outside and away from the TV, phone, and computer.
05 September 2012
Matty vs. The Mountain
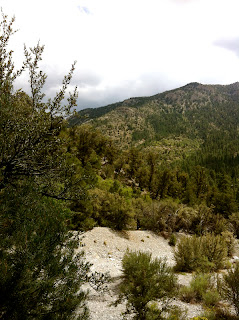
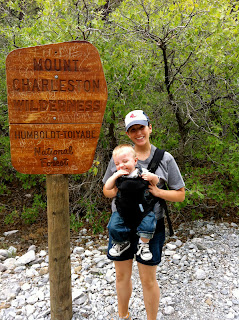
Now that everyone else is back to work after their long Labor Day weekend, Jonathan and I are finally getting OUR three-day weekend . . . and what better way to start it than a much-needed trip OUT of the claustrophobia and excessive heat of the city and up to the cooler temps and beautiful scenery of Mt. Charleston (or the Spring Mountains National Recreation Area, if you please).
Sprinkles on the windshield and ominous clouds made for a nervous drive in.
But, no worries: the weather was beautiful (72 degrees and mercifully cloudy) once we got into the mountains. With Matty strapped on Jonathan's back and Oskar's leash in my hand, we headed for Fletcher's Canyon, a trail we randomly selected, as it was one we hadn't hiked before on our previous trips.
After hiking for a bit, we stopped in this dry creek bed to get some water and let Matty out to stretch his legs and explore . . .
. . . and he promptly fell and hit his head on a rock. Fantastic. After some tears and a few kisses from Mommy, we decided it was safer for him to go BACK into the carrier, albeit on the front, where he could get snuggles from Daddy.
But it took a switch to being carried by Mommy and fun with Daddy's hat before the smiles came back.
Daddy, in the meantime, was teaching us "Survival: 101" with his knife. Here, he was showing us how to use a knife and a larger piece of wood to cut firewood.
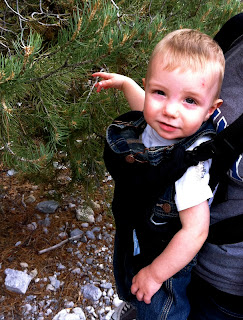
Matty couldn't have cared less. He found a pine tree to examine. "Hey--Daddy! What is this?"
"Seriously--put away the knife and camera. What IS this?"
Another break on a dead tree laying over the dry creek bed. Matty thought knocking on the wood was the best thing EVER.
Another break, another chance for Matty to get down and explore. And, thankfully, take two involved no head trauma! Instead, he had a blast playing the dirt and climbing his own mini-mountains.
But soon, it was back to the carrier, back to the car . . .
. . . and back to the scorching heat of Las Vegas. But trust me, Mount Charleston, we'll be back. Matty may have a left with a bump on his head, but I guarantee he's not finished with you yet!
Subscribe to:
Comments (Atom)
